Monday, December 26, 2011

At times, small sacrifices are necessary


i purchase a few catasetums quite sometime ago, as usual they came in sphag moss media and also as usual, my practice is to remove them from the sphag media and repot them in my preferred media. however this practice this time paid off completely.
even after removal of the moss, then entire plant seems "ok" as there are new growths and some of the bulbs fat and solid, or at least they appears full of vigor. however upon closer inspection, i notice black spots on the bulbs and therefore i took the bold decision to cut them into individual bulbs!

the more i trimmed the bulbs apart, the more signs on bulb rot i found (you can see from the third pic how extensive the damages were). some only came in 2 bulbs and the size of the bulb are merely 2 inches (in the pic where i am holding them on my palm but sad to say one is already rotting away when they arrived).

2 months after separating them, at least one from each type of the catasetums had started new growth except for one, and i only came down with 2 bulb that is totally lost, started to have duplicates of them due to the division. with some drastic measure, some are cut what ever is left is the undeveloped lead bulbs and happy to say, new roots started to emerge a few days ago (first pic).

if i were to left them in the moss or without doing further inspection , most likely i would end up losing half of them. thus i would say it is a small price to pay for in assuring their survival. sometimes small sacrifices are necessary when one are fighting a war, as the Witwicky said it "no sacrifice no victory".

and hopefully in times, the sixth catasetums in this batch would show new growth, and hopefully in time i would have the chance to publish their graceful and showy inflorescence.

but for the mean time, let us not forget that this does not means the end of this "war", but only the beginning as there are still many challenges ahead.

Thursday, December 15, 2011

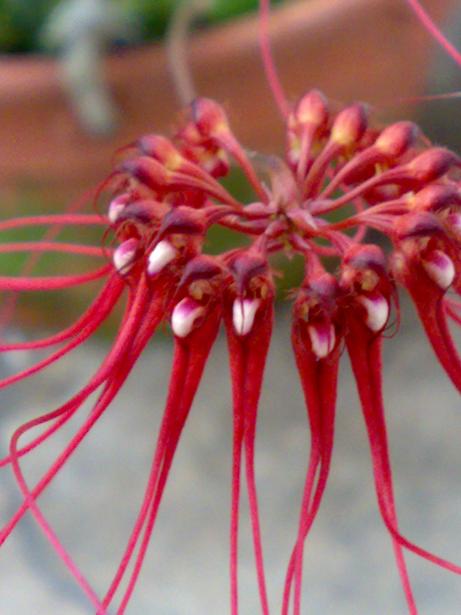
bulbophyllum gracillimum


bloomed several days ago in my mini garden, unfortunately half of the bloom was damage by something before it opens.
i liked the color of this particular gracillimum, and about 5 days later i notice that most of the flower is falling off. but surprisingly three of them had a swollen ovary that is yellow in color. the only possibility is a self cross cause it is the only bulbophyllum that flower in my garden during the time being unless it can cross with my callosum :D with flowers at the same time.
able to dig up a citing from the net, it takes roughly about 3 months for the seed to mature and seed pod can be harvested when it is about 2/3 of the maturity. surprisingly, it is stated there that seed might take from 1 to 9 months for germination!!!! seems like nothing is short term when it comes to orchids!
just as i thought my flasking adventure would be over and now there is this three seed pods forming. what should i do with them.....currently i am clearing off my bulbophyllum collection to make way for the expanding catasetum collection. sigh......

Thursday, December 8, 2011

functions of catasetums root- including root keiki


Roots as we know basically one of their main function is for water and nutrient uptake, anchoring of the plants. but for some other plants, roots may have additional function.
not known to most growers of catasetums (including me), catasetums roots also aid in


1. root keiki ( first pic showing the keiki after accidental removal and the second pic is for the comparison size of the keiki and the mother plant)
not known to many, catasetum roots can produce keiki on rare occasions. me myself had the very rare opportunity of experience this. it all started with a pot of my catasetum longiflorum. one day after coming back from work, i was heartbroken to find that the entire pot just fell onto the floor and the pots were shattered to pieces, roots were broken but the main chunk of the roots were there but i can see many tiny broken roots.
but 2-3 months later, i notice "a weed" growing beside it, did not pay much attention but somehow it looks different coz the leaves of the so called weed were thicker than usual. until one fine day i decided to pull the weed out coz it is "STEALING THE NUTRIENTS" away and just to fine there is a swelling structure at the base. i was thinking mmmmmmmmm....this one is no ordinary weeds, so i let it to sit in a small pot with some moss.
a week later i notice new roots growing with velamen structure and i said to myself "OMG!!! what have i done". knowing that it was an orchid plant and suspected a longiflorum (catasetum longiflorum had a distinct shape pattern of the leave, straight long upward leaves that are narrow, very different from other catasetums.
one particular vendor provided me with some info on this and i dig the net for a reference and "voila"!!, in the book World of Catasetums, there is a part mention in the root section that "occasionally, the main root of the catasetums may produce keiki"!!!

here are additional but not all of the function of the roots of catasetums

2.aid in photosynthesis and aeration
photosynthesis of the plants. and for catasetums collectors, some of them tends to produce tiny upright vertical roots called the pneumatophore. some grower said that production of these pneumatophores are attributed to poor aeration of the potting system, but some do not agree. from my personal point of view, those catasetums that i potted in pots that are without side holes tends to produce a lot of pneumatophores. those that with it, none to a few only. but these are general observation, i think i would need a bigger sample size observation before i could draw to any final conclusion. as far as i am concern, as long as those roots are silvery white with long green tips, i am happy with it.

3.prevention of water loss and also aid in water retention
mature orchid roots are spongy in nature and this is attributed to the presence of velamen, the outer white spongy material that covers the root of the orchids. these velamen are composed of multi layer dead epithelial cells with thick cellular wall. during watering, velamen allow passive diffusion of water in between these cells while during the dry season, it prevents rapid water loss of water from the roots by reducing transpiration loss by acting as a barrier
due to the spongy nature of the velamen, they also aid in protection of the orchid roots from physical damage.

Friday, December 2, 2011

second attempt at flasking and also DIY chamber


No intention of attempting this flasking, my garden is "exploding" with orchids and in addition this pod is infected with fungus (suspected) cause one end it turning wet, brown and yellow discoloration. the pod is only slightly above six months old so i hope that those seed inside would be viable and not infected as i skipped the seed sterilization part off. but another part of me just could turn down the chance to see the result of my catasetum cross, even it's a long shot.
for preparation of the media, you may view it at my first post on flasking media at

but my main purpose of posting this is to share the DIY flasking chamber. this is what i do
1. 2 feet aquarium, cleaned then sprayed with diluted bleach 1:9, leave for 10 mins
2. put all the prepared flask with agar, knife, seed pod, towel, etc ...
3. take 2 sheets of newspaper, spray one side entire wet with the diluted bleach solution
4. cover the "top" of the aquarium (top of the aquarium facing you), using the weight of the aquarium to anchored the ventral part of the newspaper, the top, left and right of the newspaper is "stick" to the aquarium by wetting it with the diluted bleach solution. the third pic shows how the papers adhere to the aquarium when it is wet
5. now spray the outside part of the newspaper with the diluted bleach till it is wet, leave for 10 mins
6. wet your gloves with diluted bleach solution, gently and carefully make a small opening through the newspaper with each of your had. now both of the hands is in the chamber with the bleach laden newspaper acting as peripheral seal around your arm. then start sowing!!

the last two pics are the end product of this nebulous attempt.
i got minimal faith for this flasking, did not measure the pH, no seed sterilization and etc. perhaps too discourage by the infected seep pod. well. keeping my finger cross.

Saturday, November 12, 2011

Phases of catasetum growth cycle

On and off i still encounter questions like "is my catasetums going into dormant phase?". "the spike just ended and bulbs looks mature, should i stop watering?",
"the bulbs are mature, leaves still attached, should i stop watering?" and the last but not all "i need some advice here, my catasetum is
shedding all the leaves, what have i done wrong?"
here i would like to show the multiple phases of catasetums growth cycle and most important to point out when catasetums is considered dormant.
the first two pics here showing the emergence of a new growth from a dormant bulb that i separated several months back (yes, sometimes it may take months for a new growth to appear, sometimes weeks only). it is not necessary to separate the bulbs while in dormant phase.


the subsequent picture is the new lead bulb is optimal growth phase, most of the catasetums begins to flower at this phase. here you can see that the normal fat pseudobulb shape has not taken place yet and during this phase, they grow very fast and hence they require heavy watering and feeding.


Here the shape of the pseudobulb is taking place but the bubs are elongated and thin and has not reach full maturity yet. i still give them heavy feeding at this phase.


bulb attaining full maturity, characterized by the fat bulb appearance from the base and also the silvery dry membranous sheath that is
covering the bulb. by time these sheaths will fully enveloped the entire bulb.
cut down watering at this phase and minimal fertilization is needed, depending on media it is planted in (mine is 100% for this plant) is still water once a day instead of twice. as more of the leaves is shed, the frequency of watering is reduced gradually.
beside the bulbs several pneumatophores roots are present.


this is the dormant phase of catasetums, all the leaves are shed (deciduous nature of catasetums) leaving the bulbs behind. as you can notice here i removed all the membranous sheath because i notice that ants or insects tends to nest inside and the also collect water during the intermittent watering. in addition to that, i have itchy hands!!! LOL
watering at this phase is kept minimal, usually the media is left dry most of the time and watering is done only when i notice the bulbs shrivel slightly. u will notice the smooth surface of the bulb begins to wrinkle and that is when i water them. usually i will also take this opportunity to treat the entire media in fungicide solution.
whether or not to divide its entirely up to individuals and some even uproot the entire plant and leave it sitting alone with the media.

and again, all these are my personal experience and cultivation practice may differ under different environment the plant is kept. i would also encourage one to share their opinion here. Good luck!!


Thursday, November 3, 2011

catasetum atratum x catasetum purm


initially bought this plant labelled as catasetum purum. however after flowering, it is obvious that

flower is about 3cm in length and 2 cm plus in height, slight fragrance noted. this time had 15 in a spike but it could be more. despite the small flower size, this catasetum plant is a big plant. mine currently is about 7inches for the back bulbs. but the currently one that is giving out the spike is longer, hoping for the bulb to mature and to re pot it into my usual media.

Thursday, October 27, 2011

experimenting with new media combination

though from my previous post one may notice that i am not a sphag guy for catasetums, but recently i am experimenting by mixing some sphagnum moss in the charcoal media. but instead of packing a large ball of sphagnum moss in the media, i am actually laying the moss in lace pattern, alternating strands of moss with charcoal media and with charcoal as top finishing.
reason for doing this
1. moss embedded in the charcoal are protect from light and thus less problem with algae growth
2. by laying moss in strands rather than a big chunk, they dry faster and less rotting problem yet in the same time produce the additional moisture and fertilizer it adsorb during watering

i had been experimenting this for about two months, so far the results are encouraging, especially for weak bulbs, or those revived from very shrivel bulbs. they tend to recuperate faster.

i would also welcome any comments or those who wanted to share his/her experience with catasetum media cultivation.